댓글 목록 보기
댓글은 라우팅에 따른 페이지 역할이 아니고 게시판 상세보기 하단에 위치하므로 components 폴더 아래에 구현한다.
먼저, DTO 객체인 Comment.ts 인터페이스를 dto 폴더 아래에 추가한다.
|
1 2 3 4 5 6 7 |
export interface Comment { id?: number; content: string; created?: string; updated?: string; board_id?: number; } |
components 아래에 CommentList.tsx 컴포넌트를 추가한다.
|
1 2 3 4 5 6 7 8 9 10 11 12 13 14 15 16 17 18 19 20 21 22 23 24 25 26 27 28 29 30 31 32 33 |
interface Props { board_id: number; } const CommentList: React.FC<Props> = (props) => { const [comments, setComments] = useState<Array<Comment>>([]); useEffect(() => { if (!props.board_id) { return; } getComments(props.board_id); }, [props.board_id]); const getComments = async (board_id: number) => { const res = await axios.get(`/api/comments?board_id=${props.board_id}`); setComments(res.data); } return ( <> { comments.map((comment: Comment) => <Row className="comment" key={comment.id}> <Col xs={12} className="date">{comment.created}</Col> <Col xs={12}>{comment.content}</Col> </Row> ) } </> ); }; |
components 폴더에 CommentList.scss 를 추가한다. CommentList.tsx에는 Comment.scss를 import 해야한다.
|
1 2 3 4 5 6 7 |
.comment { border-bottom: 1px solid #dddddd; padding: 0.4rem; .date { font-size: 0.7rem; } } |
BoardView 컴포넌트에서 돌아 가기 버튼 바로 위에 댓글 컴포넌트를 추가한다.
|
1 2 3 4 5 6 7 8 |
... <commentlist board_id="{match.params.id}"></commentlist> <row classname="justify-content-center mt-3"> <button variant="primary" onclick="{()" ==""> history.goBack()}>돌아가기</button> </row> ... |
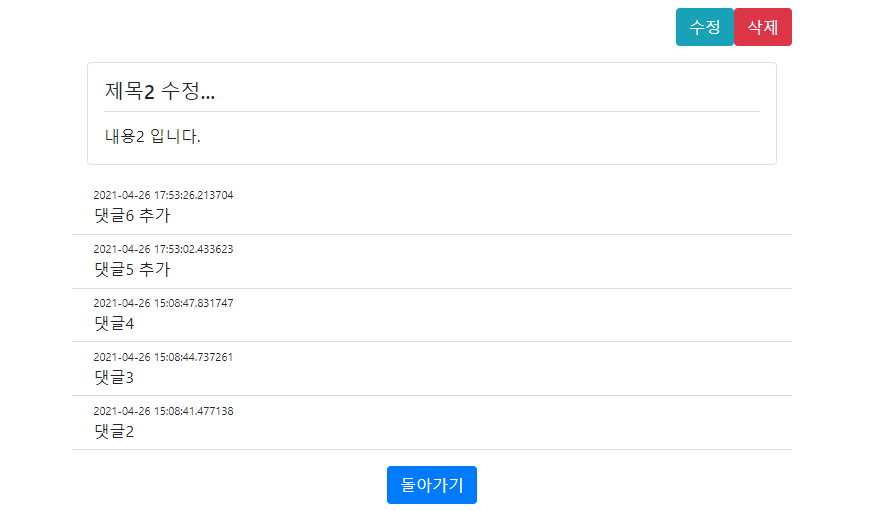
댓글이 있다면 아래와 같이 보일것이다.

댓글 쓰기 구현
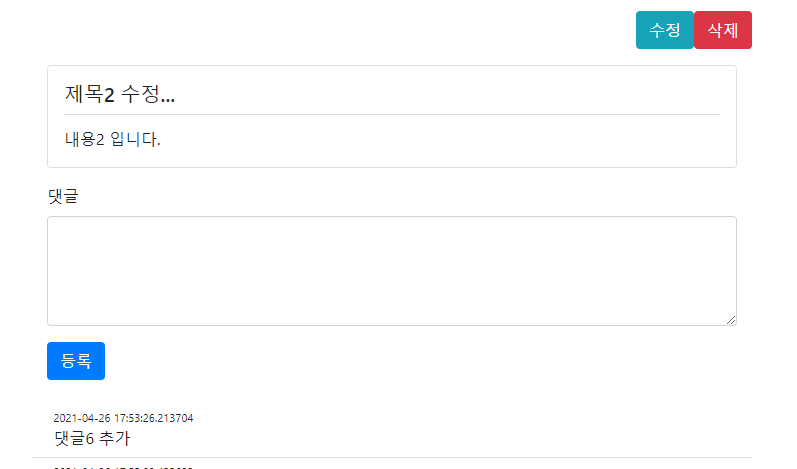
게시판 등록 페이지에서는 html5 validation을 사용하지 않았는데 여기서는 html5 validation을 사용해보겠다. 단순히 noValidate 만 제거 하면 된다. 그리고 requried 속성만 추가한다.
|
1 2 3 4 5 6 7 8 9 10 11 12 13 14 15 16 17 18 19 20 21 22 23 24 25 26 27 28 29 30 31 32 33 34 35 36 37 38 39 40 41 42 43 44 45 46 47 48 49 50 51 52 53 54 55 56 57 58 59 60 61 |
const CommentList: React.FC<Props> = (props) => { const [comments, setComments] = useState<Array<Comment>>([]); useEffect(() => { if (!props.board_id) { return; } getComments(props.board_id); }, [props.board_id]); const getComments = async (board_id: number) => { const res = await axios.get(`/api/comments?board_id=${props.board_id}`); setComments(res.data); } const handleSubmit = async (event: any) => { event.preventDefault(); event.stopPropagation(); const form = event.currentTarget; const comment = { board_id: props.board_id, content: form.commentText.value } let res = await axios.post('/api/comment', comment); console.log(res); res = await axios.get(`/api/comment?id=${res.data.id}`); const newComments = [...comments]; newComments.unshift(res.data); setComments(newComments); form.commentText.value = ''; }; return ( <> <Form className="mb-4" onSubmit={handleSubmit}> <Form.Group controlId="commentText"> <Form.Label>댓글</Form.Label> <Form.Control required as="textarea" rows={4} /> </Form.Group> <Button variant="primary" type="submit"> 등록 </Button> </Form> { comments.map((comment: Comment) => <Row className="comment" key={comment.id}> <Col xs={12} className="date">{comment.created}</Col> <Col xs={12}>{comment.content}</Col> </Row> ) } </> ); }; |
댓글이 빈채로 누르게 되면 required 속성을 만족하지 않았으므로 submit이 일어나지 않을것이다.
글을 입력하고 등록을 누르면 서버에 REST api를 호출하게 되고 해당 글을 리턴으로 받아서 바로 위에 추가하게 된다.

